This is a small blog post about extending the functionality of Windows 8. I will be concentrating on adding a start menu and skipping the “metro” screen. At the end of the article I will discuss making this into a package for SCCM.
Prerequisites
- One machine with Windows 8 installed.
- Download Classic Shell.
Getting Organized
- Make a folder in “C:\workingtemp\classic shell” and place your “ClassicShellSetup_3_6_7.exe” in this folder.

- Now open a command prompt, change directories to classic shell and run the following command. This will extract the msi installer.
ClassicShellSetup_3_6_7.exe extract64
- Now that we have the msi installer, lets start setting up classic shell.


Configure Classic Shell and skip metro screen
- Double click your msi in the classic shell folder and install classic shell with the default options.
- After the installation is finished you will see your new start button.

- Now hit your start button that just appeared. A menu called “Settings for Classic Start menu” will appear. Choose your start menu style and click the “All settings” option at the bottom.

- Navigate through the tabs and setup the start menu how you would like.
- Under the “Windows 8 Settings” tab, ensure that the “Skip Metro Screen” box is checked.
- Once you have your start menu setup how you like you are done. Move on to the next section if you would like to save your settings for deployment to other systems.


Retrieving your saved settings (optional)
- Note: To deploy classic shell with your custom settings, you must do this via registry settings. The “Backup” option in classic shell settings is more geared towards recovery of settings.
- Open “regedit” and navigate to “HKEY_CURRENT_USER\Software\IvoSoft”.
- Right click on “ClassStartMenu” and click “Export”. Name your export file something like “Classic_Shell_Settings.reg”. Export your registry settings to your “C:\workingtemp\classic shell” folder.

- You should see your registry settings in your classic shell folder now.

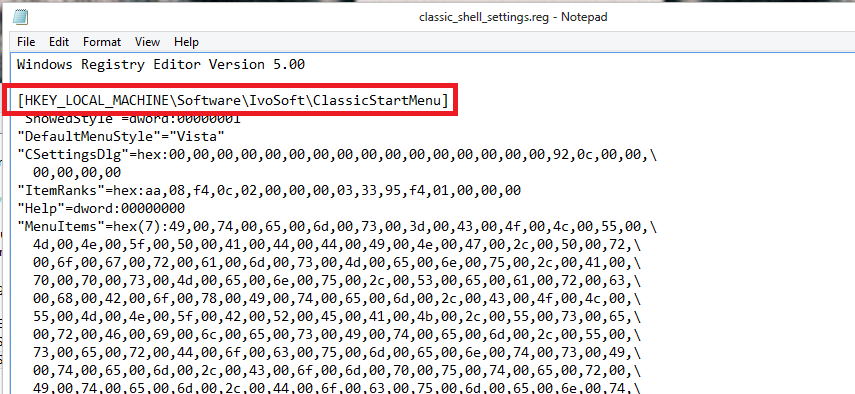
- Open your registry file and change “HKEY_CURRENT_USER” to “HKEY_LOCAL_MACHINE”. Your file should look like this when you are done.

- Your settings are now saved correctly and we can move on to build the batch file.


Build the batch file (optional)
- Create a new batch file and name it “Install-ClassicShell.cmd”. The objective of this batch file is to install classic shell silently. This will be used later when we package classic shell for sccm.
- Insert the following code into your batch file.REM Install Classic Shell
ClassicShellSetup64_3_6_7.msi /qn START_MENU_FOLDER=0REM Import classic shell reg settings
reg.exe import “.\classic_shell_settings.reg” /reg:64REM Disable first Logon Animation
reg.exe add “HKLM\SOFTWARE\Microsoft\Windows NT\CurrentVersion\Winlogon” /v EnableFirstLogonAnimation /d 0 /t REG_DWORD /f - The batch file will install classic shell silently, import your preconfigured settings and disable the windows 8 first logon animation.
Build the package (Optional)
- Note: I am assuming you already know how to make a package in SCCM.
- Transfer your classic shell files to your “Data Source” for your packages.
- Open SCCM 2012 and navigate to packages.
- Create a new package and name it. Use your batch file as the “Program”.
- Distribute the content and deploy to your appropriate collection.
- Test the package on a vanilla windows 8 box. Ensure your settings are being applied to classic shell.
- Note: You may have to restart for the settings to be applied.
- You should be done.